Did you know phishing is the most common cybercrime, with an estimated 3.4 billion daily spam emails?
Phishing emails are fake messages that trick you into giving away personal information like usernames or passwords.
Besides, phishing emails are getting smarter and more dangerous, especially when they target popular platforms like WordPress. If you manage a WordPress site, then chances are you’ve received suspicious emails.
Those emails look official but are designed to steal your login credentials or inject malware. So, knowing how to avoid WordPress phishing emails is crucial for protecting your site, data, and visitors.
Therefore, in this guide, we’ll discuss the warning signs of phishing attempts, how to spot fake WordPress messages, and the best steps to keep your inbox and your website safe.
So, stick with us!
What are Phishing Emails and How They Target WordPress Users?
First, let’s have a quick look at what phishing emails are.
Phishing emails are fake messages sent by hackers who pretend to be someone you trust, like WordPress. They try to trick you into giving away important information or even credit card details.
These emails often look very real, making it hard to tell they’re fake.
As per the record:
- Millennials and Gen Z internet users will most likely fall victim to phishing attacks. (Source)
- Nearly 1 billion emails were exposed yearly, affecting 1 in 5 internet users. (Source)
- More than 48% of emails sent in 2022 were spam. (Source)
Moreover, WordPress is a popular content management system, so over 43% of site owners use it to build websites. Knowing this, hackers create fake emails that look like they’re from WordPress.
They might say things like:
- Your WordPress plugin is out of date. Update now!
- There’s a security issue with your site. Click here to fix it.
- Confirm your login details to continue.
- Your WordPress site has a problem. Click here to fix it!
These messages are designed to make you act quickly without thinking, so you don’t realize they’re fake.
Besides, emails might look just like a real message from WordPress, with logos and official-looking text. But when you click the link, it takes you to a fake WordPress login page. If you enter your username and password there, then hackers can now access your site.
The goals of these fake emails are to:
- Take control of your WordPress website.
- Change your website’s content.
- Steal information from your visitors.
- Use your site to send more fake messages to others.
Sometimes, they might even ask you to download a file, saying it’s a needed update. But that file could contain harmful software that damages your computer or website.
Common Red Flags in Suspicious Emails
It’s crucial to recognize the warning signs, which can help protect you from these scams. Here are some common red flags to watch out for:
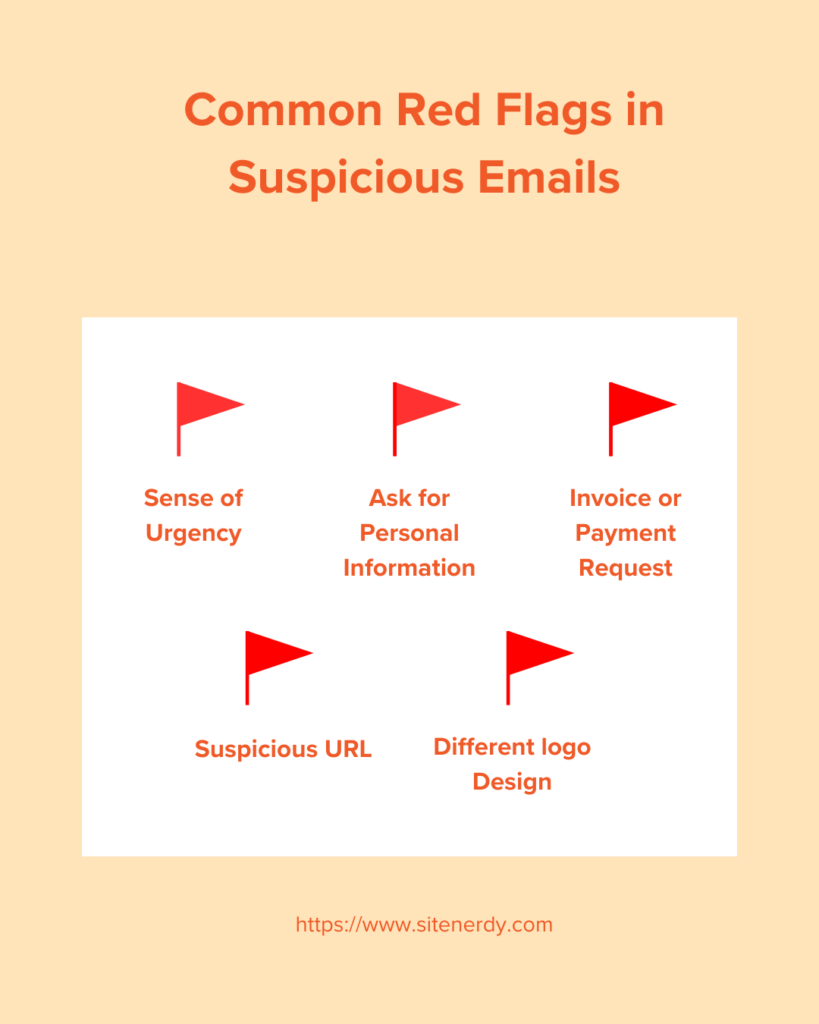
- Phishing emails often come from addresses that look similar to legitimate ones but have slight variations.
- Scammers try to create a sense of urgency. They use phrases like “Your account will be suspended” or “Immediate action required” to make you panic.
- Organizations typically proofread their communications, but phishing emails often contain spelling mistakes, poor grammar, or awkward phrasing.
- Companies will not ask for sensitive information like passwords, Social Security numbers, etc. via email. If an email requests this information, then it’s likely a phishing attempt.
- Receiving an invoice or payment request for something you didn’t purchase is a common phishing tactic.
- Sometimes, the text of a link in an email may look legitimate, but the actual URL it points to is different.
- Phishing emails may use logos and branding that look slightly off or outdated. Pay attention to the overall design and formatting of the email.
By staying vigilant and recognizing these red flags, you can protect yourself from phishing scams and keep your personal information secure.
How to Avoid WordPress Phishing Emails?
As you can see, there are many ways to get trapped by email phishing, so let’s look at how to avoid them.
1. Verifying the Authenticity of WordPress Emails
Real WordPress emails come from addresses ending in @wordpress.org or @wordpress.com.
If you see something different, like wordpress-security-alert@example.com, then it’s probably a fake.
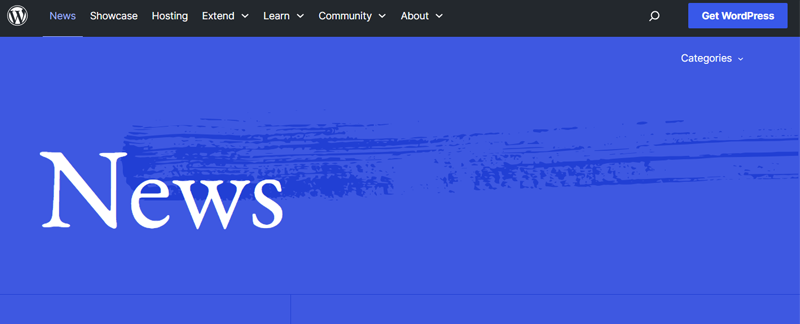
Besides, WordPress will always release a notice if there are any changes. So, do check WordPress.org news before acting upon an email.
If you’ve received real emails from WordPress before, then see if this one looks similar. Suppose it looks different or odd. Then, it might be fake.
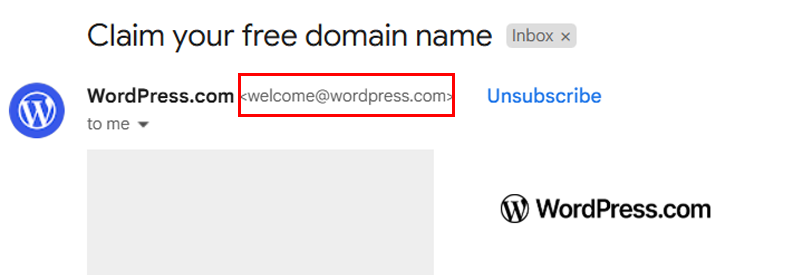
2. Verify the Sender’s Domain Signature
When someone sends you an email, you can check who sent it by looking at the email address. This helps you know if the email is from the real WordPress or someone pretending.
For example:
An email from welcome@wordpress.com is real because it ends with @wordpress.com, which is WordPress’s actual email.
An email from wordpress-security-alert@example.com is fake because it doesn’t end with the real WordPress domain.
Now let’s learn how to double-check even more carefully! First thing, they have a domain signature! Now, what is that?
A domain signature is a hidden code in the email. It helps your email service (like Gmail or Outlook) know if the message came from who it says it did.
There are three essential checks:
- SPF (Sender Policy Framework): This checks whether the email is sent from an IP address allowed by the domain’s administrators.
- DKIM (DomainKeys Identified Mail): Adds a digital signature to the email that the receiving server can verify with a public key.
- DMARC (Domain-based Message Authentication, Reporting, and Conformance): Uses SPF and DKIM results to tell receiving servers what to do if a message fails the checks (e.g., reject or quarantine it).
Step to Check the Domain Signature
Open the email, but do not click on any links inside it. This is like reading the behind-the-scenes information in emails.
In Gmail, click the three dots in the top-right corner of the email. Then click “Show original.”
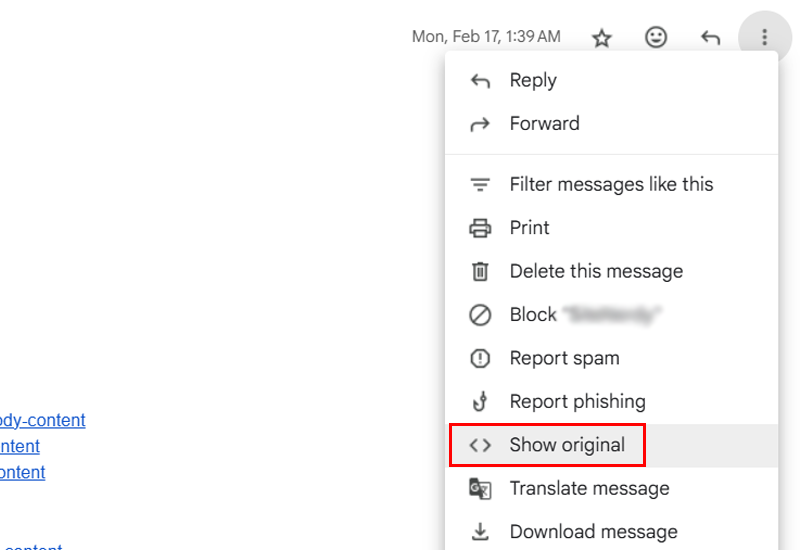
Following that, look for these lines in the header:
- SPF: PASS
- DKIM: PASS
- DMARC: PASS
The relevant text might look like:
Authentication-Results: mx.google.com;
arc=pass (i=1);
spf=pass
If they all say PASS, then the email is safe. However, the email might be fake if one or more say FAIL or are missing.
So, be safe online by learning to check the sender’s domain.
3. Cross-Check with Previous Official WordPress Emails
Sometimes, you might get an email that says it’s from WordPress, but you’re unsure if it’s real or fake. One smart way to tell is to compare it with emails WordPress has sent you before.
If you’ve gotten real emails from WordPress in the past (like updates, password reset emails, or security alerts), find one of them.
Open your email inbox and search for:
- “wordpress.org”
- “WordPress support”
- “WordPress login”
Pick an email you’re sure was real. Check who sent the old email and who sent the new one.
Does the new email come from the same email address?
If the new email has a strange address like wordpress-security-alert@example.com, then that’s a warning sign. It could be fake.
Following that, compare how the emails are written. Do they sound the same? Do they use the same kind of words and layout?
Real WordPress emails are usually clear, polite, and easy to read. The new email might not be from WordPress if it feels urgent, rude, or full of mistakes.
In the old email, if there’s a link, hover your mouse over it (don’t click!). It probably goes to a page like wordpress.org.
Do the same with the new email. If the link in the new one goes somewhere weird or different, be careful! It might be a fake email trying to trick you.
4. Verify URLs by Hovering Over Links
Sometimes, fake emails will try to trick you into clicking bad links. These links might look safe, but they lead to dangerous websites!
But guess what? There’s an easy trick! Open the email, but don’t click anything! Move your mouse pointer on top of the link or where it says “Click here.” Look at the bottom left corner of your screen and the full web address (URL) will appear.
Read the URL carefully.
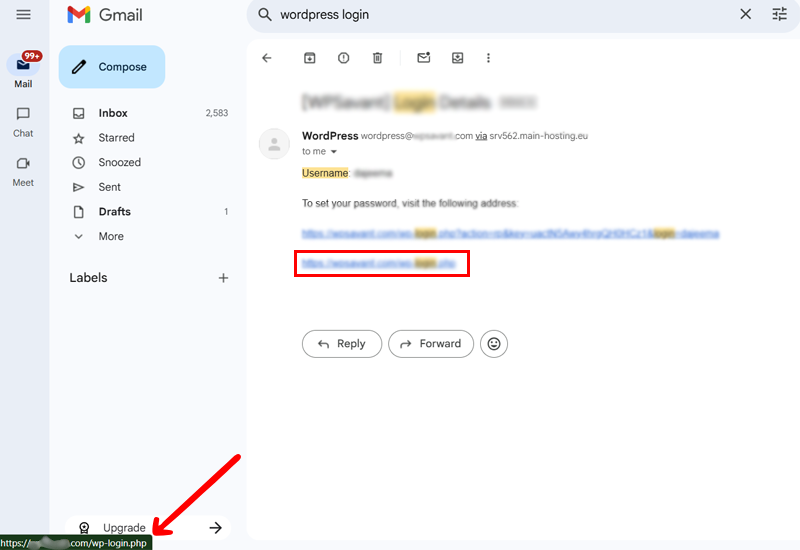
Ask yourself:
- Does the link go to a real WordPress site, like wordpress.org or login.wordpress.net?
- Or does it go somewhere weird, like wordpress123.example or security-fix-example.com?
Don’t click if it looks strange or has extra words or numbers!
5. Use WordPress Security Plugins
Security plugins help protect your website from hackers who try to break in or trick you with fake emails. There are many security plugins, such as Wordfence Security, Sucuri Security, Solid Security, etc.
But you don’t need all of them, so pick one that works best for you.
These plugins will:
- Block people who try to guess your password.
- Check your site for viruses or anything suspicious.
- Send alerts if something weird is happening.
- Some bots may try to crash your site. Security plugins stop them.
Always remember, even if your site is small, hackers can still try to attack it.
Steps to Take if You Suspect a Phishing Email
If you think an email is fake or trying to trick you, don’t panic! Just follow these steps to keep yourself and your WordPress website safe.
1. Do Not Interact
Don’t click on anything in the email. Don’t reply. Don’t download any files or open any attachments.
Phishing emails often have bad links that can steal passwords or install viruses on your computer. Just leave the email alone. If you already clicked something, don’t worry! Just keep reading and take the next steps right away.
2. Report the Email
If you think the email you received is fake, tell someone about the email, like your email provider, WordPress, or website host.
Suppose you’re using Gmail. Then, open the email, but do not click on any links inside it. Click the three dots next to the reply button, then choose “Report phishing.”
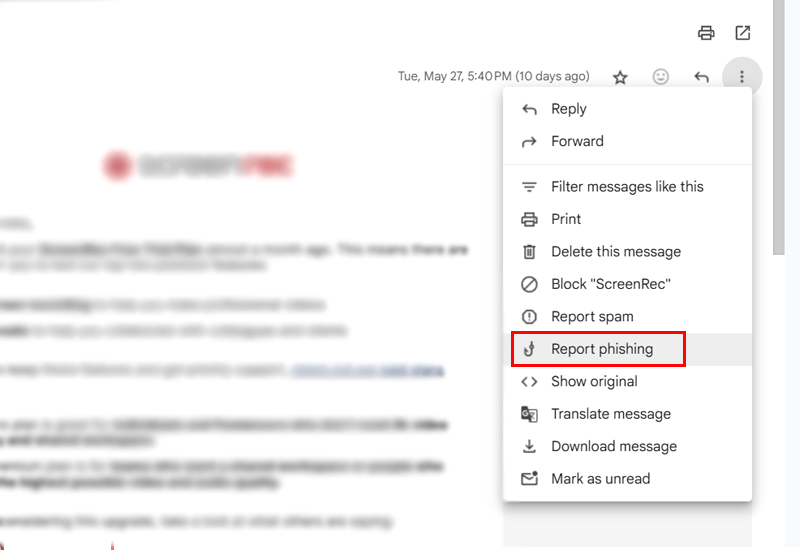
You can also tell your web hosting company or contact WordPress support if the email is pretending to be from them. Reporting helps stop hackers and protects other people, too.
3. Run a Security Scan
Use a security plugin like Wordfence to check your WordPress site for dangerous elements such as viruses, malware, or hidden hacker tools.
First, install and activate the Wordfence security plugin on your WordPress dashboard.
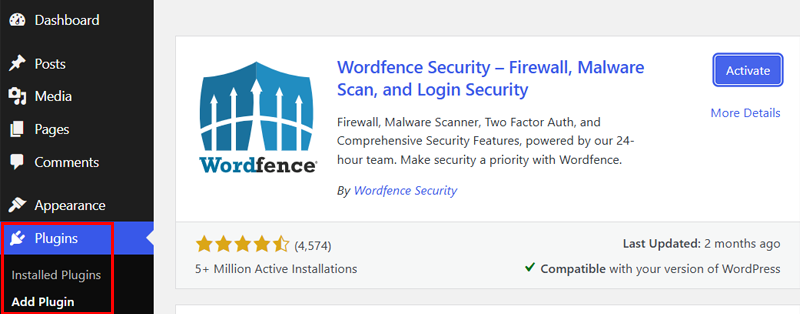
For a more detailed guide, check our article on how to install a WordPress plugin.
Go to your WordPress dashboard, click “Wordfence > Scan > Start New Scan.” Let the plugin check everything on your site.
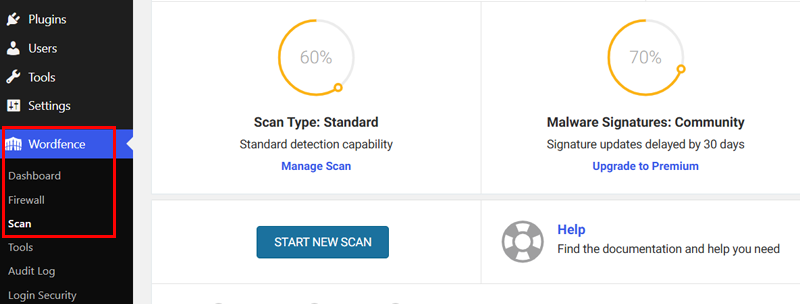
This security scan helps you determine if anything bad got into your website.
4. Change Passwords
Update your passwords so no one else can get into your accounts.
Change the passwords for:
- Your WordPress admin account.
- Your email account.
- Your web hosting account.
- Any other place where you use the same or a similar password.
Ways to create strong passwords:
- Use passwords that are at least 12 characters long.
- Always mix uppercase and lowercase letters, numbers, and special characters.
- Don’t use the same password across multiple sites.
- Avoid using easy-to-guess information like your name, birthdate, or common words.
Remember, someone might have stolen your password if you click a bad link. Therefore, changing the password will lock them out.
Besides, you can take help from password manager tools, like LastPass, DashLane, and 1Password. These tools will generate complex passwords for your accounts and store them in the cloud.
Moreover, these password managers use a master password to manage all your passwords. Additionally, many use multi-factor authentication for an extra layer of protection.
For more details, check our article on how to stop brute force attacks.
5. Safely Restore a Clean Backup
Go back to an earlier version of your website before the problem happened.
How to do it:
- Use a backup plugin like UpdraftPlus or Jetpack Backup.
- Choose a backup that was saved before you got the phishing email.
- Follow the plugin’s steps to restore your site.
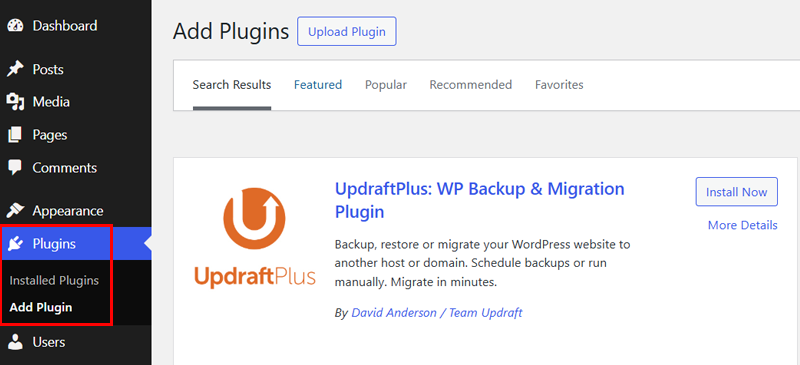
Start by installing and activating the plugin.
And then connect your UpdraftPlus to Google Drive. Go to the “UpdraftPlus Backups > Settings” tab.
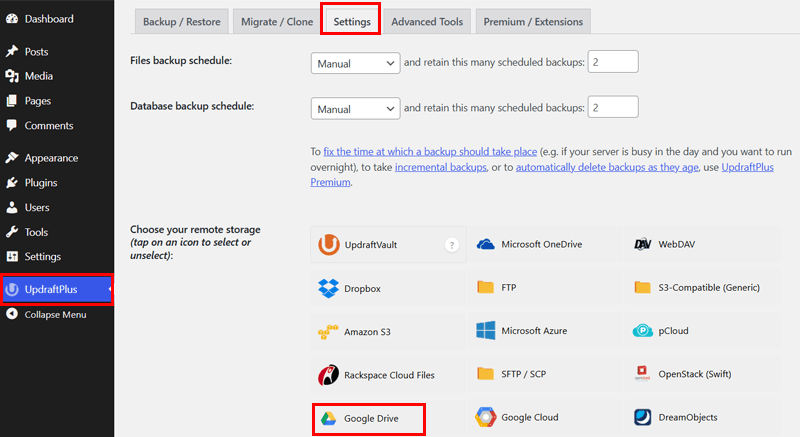
Under the “Choose your remote storage” section, go ahead and click on the “Google Drive” option.
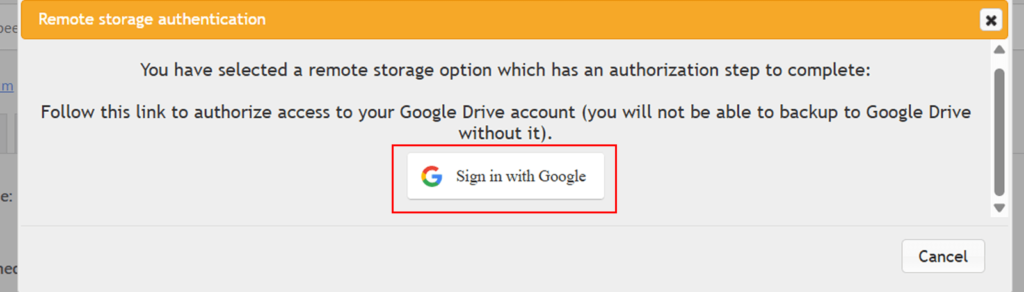
Then, click on the “Sign in with Google” button.
Then, follow the instructions to give UpdraftPlus access to your Google account. Once connected, create an automatic backup schedule.
Go to the “UpdraftPlus Backups > Settings” tab and you’ll see an option to schedule automatic backups.
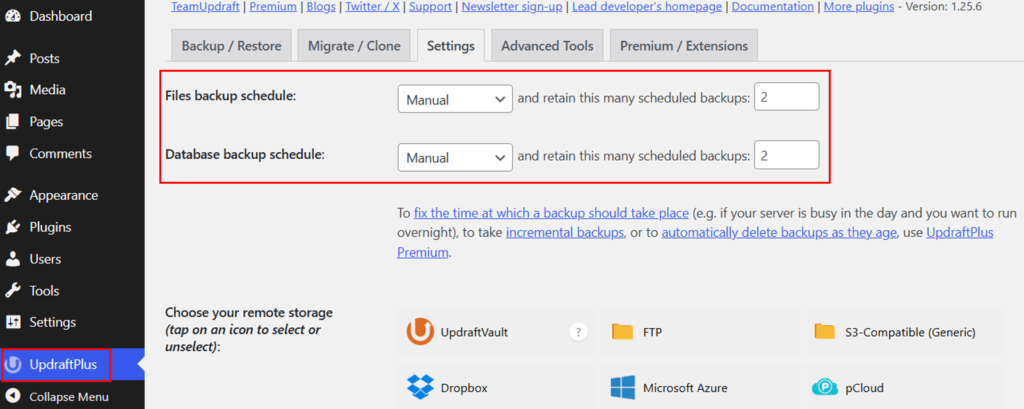
Now, on how frequently UpdraftPlus should back up your site, you can choose from once every month to once every 2 hours. Enter any number of times you’d want UpdraftPlus to keep the backup.
You can then restore your backup! To do so, navigate to the “UpdraftPlus > Backups” page.
After that, scroll down the page until you reach the “Existing Backups” section.
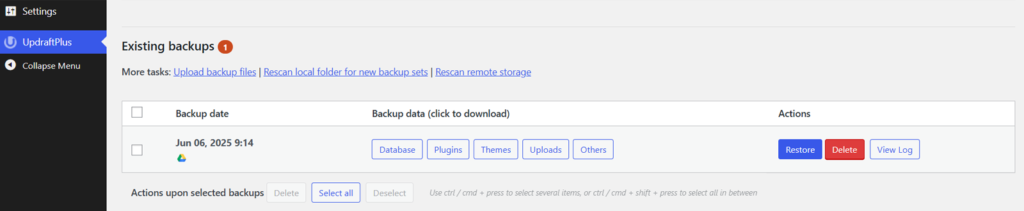
Find the backup you want to restore and press the blue “Restore” button.
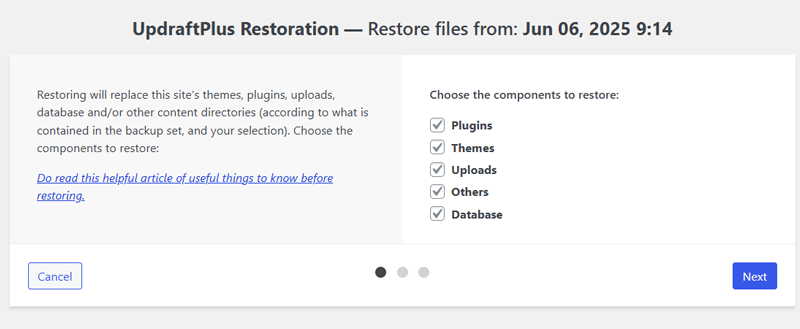
Then, it’ll redirect to the page to choose the components you want to restore. After clicking all the required boxes of components, click on the “Next” button.
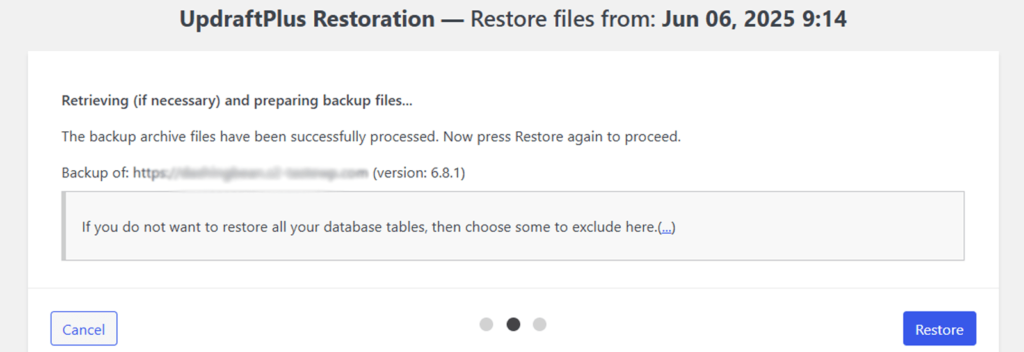
After that, UpdraftPlus will prepare all the files from your Google Drive. Depending on the number of plugins, themes, and other files on your site, this might take a while.
Once successfully ready for restoration, you just need to click the “Restore” button. And UpdraftPlus will restore your backup.
For more detailed information, check our article on backup WordPress to Google Drive.
6. Update WordPress Version, Themes, and Plugins
If you’ve clicked on a link in phishing emails, then updating your site ensures they can’t use the same method again. Outdated themes, plugins, or WordPress core files may contain security issues that hackers can exploit.
Make sure everything on your website is up to date.
Go to your WordPress dashboard and click on “Updates.” Let’s say you have pending updates. Then, they’ll be shown on this page. Here, you can update your WordPress core, theme, and plugins.
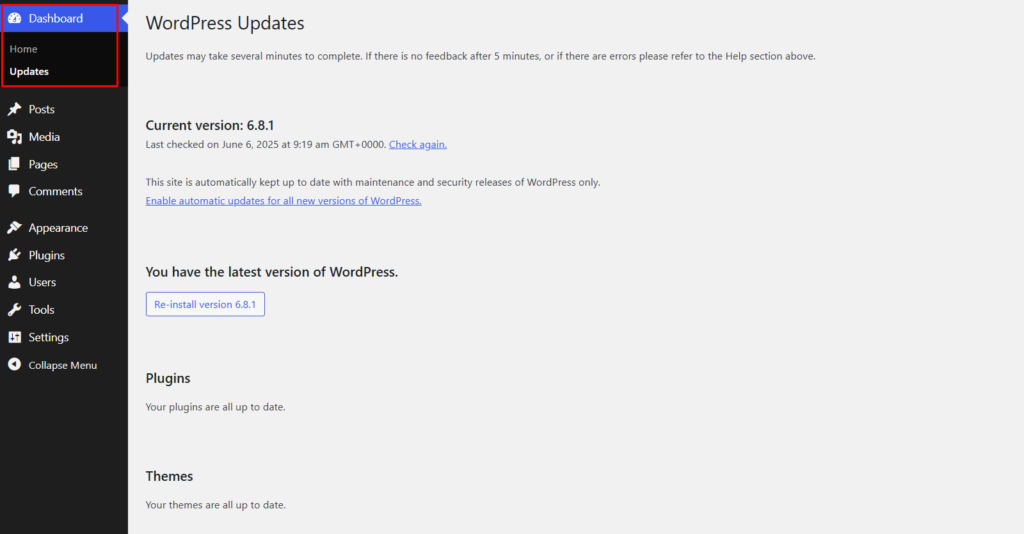
Updates fix security problems. Old versions can have holes that hackers use to sneak in.
7. Check All Users
Finally, see if any strange users have been added to your WordPress site.
Go to your WordPress dashboard and click the “Users > All Users” option from the menu.
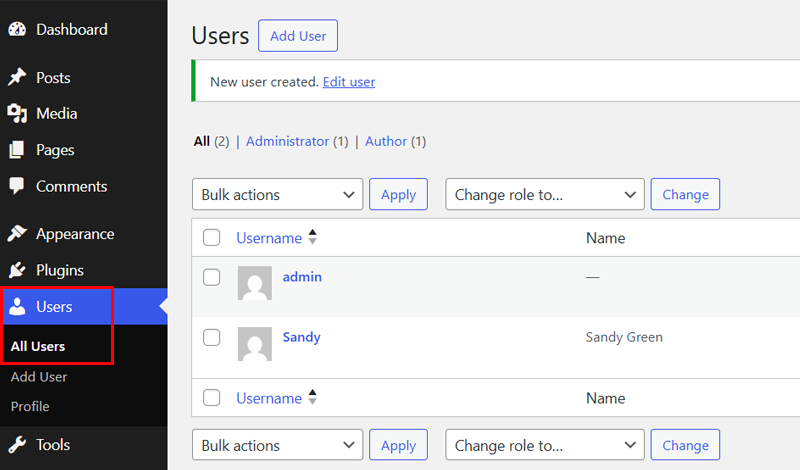
After that, look through the list. Do you see names or emails you don’t recognize? Delete them right away.
Sometimes hackers create new users to sneak back into your site later. Besides, there are many plugins you can use to monitor user behavior, like WP Activity Log and Activity Log.
You just need to activate and install one of these plugins, and it’ll start logging activities.
For example, with the WP Activity Log plugin, go to your dashboard’s “WP Activity Log” menu. And right away, you’ll see who logged in, what changes were made, and when.
By following these steps, you protect your website, data, and yourself. Always be careful, take your time, and ask for help when in doubt.
Frequently Asked Questions (FAQs)
1. What should I do if I accidentally click on a suspicious link in an email?
Immediately disconnect from the internet, run a full antivirus/malware scan on your device, change your passwords (especially for WordPress and email), and check your website for unusual activity.
2. Are there specific times when phishing emails are more prevalent?
Yes. Phishing emails often increase during holidays, tax season, major sales events (like Black Friday), or after big security news. Stay extra alert during these times.
3. Is it safe to download attachments from emails claiming to be from WordPress?
No. WordPress usually does not send attachments. If an email has one, then it’s likely fake. Do not download it unless you are 100% sure it’s from a trusted source.
4. Can phishing emails affect my website’s SEO or lead to blacklisting?
Yes. If your site gets hacked through phishing, it could be used to spread malware or spam, which may harm your SEO rankings and lead to your site being blacklisted by search engines.
Conclusion
That’s all for now!
Here, we’ve discussed how to identify and avoid WordPress phishing emails. We also discussed dealing with potential vulnerabilities and some security measures you can apply to keep your website safe.
If you have any queries or suggestions, feel free to comment below in the comment section.
This article helped you learn about phishing emails and how to avoid them. You might also want to see articles on how to remove ‘not secure’ from your website and ways to secure your e-commerce site.
Like this article? Please share it with your friends and colleagues. Also, follow us on Facebook and X for more articles like this.
YOU MIGHT ALSO LIKE...
We've picked you some best articles that you might be looking for. Check them now!